Thursday, October 31, 2013

Coat/Shoe closet organizing

We live in Southern California so coats are not much used here, so we use the coat closet to store our shoes. I had these ikea hanging organizers from our apartment days which always used to hold our shoes. I reused them when we moved to this home. Initially they used to have both me and my husbands. But eventually my collection grew and his stuff was kicked into the garage :) Now my daughter's collection is growing and I refused to move mine to the garage so here is how the closet started to look.


Time for some purging. I pulled all the shoes out and laid them on floor. And pulled out stuff that can go to Goodwill and trash in separate bags.


Can you see my daughter has almost as many pairs as me? Its my fault, I couldn't help because they are so cute, plus I buy them on flash sale sites so I just buy few pairs at a time in little bigger sizes so I don't have to run to store when a regular wear shoe doesn't fit anymore. Yes, their feet do grow overnight, at least it seems so.

Anyway, after some organizing, here is how the closet looked.


I used some shoe boxes to store socks and extra flip-flops for house guests. Orange and black ones looked ok but the other one had shoe company name all over it so used some wrapping paper to pretty it up. The remaining boxes are my Fall/Winter boots and the girl's bigger size shoes for future. 

And some simple labeling to know which one has socks and which one has flip-flops.


I added a small entry rug I had on the floor for some color. I also wrapped another shoe box in Target dollar bin paper which I used here (I reused that paper from changing table as we no longer use it. I am planning to repurpose that table for organizing, stay tuned for that post) and labeled it as 'Stinky Socks'. I bought this book for the girl called Yummy Yucky which tells well, whats yummy and what's yucky. It has stinky sock in that book. Now while removing shoes she can relate to that and put the socks in that bin.


I know I need to paint the walls in this closet. But overall it does look neat when it is organized. Now if only I can keep it that way.

Wednesday, October 30, 2013

Halloween week series - Day3 - THE COSTUME

Today is Day 3 of my Halloween Series I started on Monday. I just wanted to show the costume I had ready for the kid. I bought 2 costumes on clearance ($7 each) at Carter's store last year just couple of weeks before Halloween. The little Lady Bug and a cute Lion.


My then 18 months baby fit into the bug perfectly. She looked so cute in it.


Though the pants of Lion costume were just right then, the top was little baggy and long. So I saved the Lion for later. I thought I could find a pant in yellow and it will work fine for next year. Fast forward to 2013 Halloween (how did that happen so fast?) the pants were too short. And I did not find yellow pants. The girl has always been on the skinny side so the only problem with old clothes is the height. She is tall, very tall for her age. so I had to do some patch work. Luckily the fabric was an easy find and more luckily, I had taken some sewing classes recently. Since the hoodie had orange, I attached an orange fabric in same type of material (I am not sure what that type of fabric is, may be Flannel) and it worked so well. Looks like the costume was made like that.

I haven't put it on her yet, because once she has it on, she doesn't want to take it off. She is into Lion King stories and cartoons these days so the timing couldn't be more perfect.

I am off for now, need to bring cookies for school tomorrow. But I will be back tomorrow to post about some treat.

Old Calendar update

I bought a calendar around christmas last year for Jul 2012 to Jun 2013 at the clearance rack, I think in Target. And I did not use it until Jun 2013. Around mid June, I started using it but only for couple of days. I felt bad to waste whatever little money that was spent on it. I liked the colors in it. Wish I had used it. Then I quickly realized, if I can change the days labels just a bit, I can reuse this calendar for this year. So I updated them with couple of colors of wash tape.


This calendar starts with Sunday, like most of the traditional calendars. I changed it to start with Monday. It worked out great that way since the actual week for appointments, chores etc. starts on Monday anyway. Now if I had to make the week start with Tuesday to make the dates work, then it would have been useless.


I used plain green wash tape first and then Pink Chevron to better cover the printed day underneath. It looks nice and matches with the colors in design. I had just handwritten the days on the tape with a marker. I still need to breakout the label machine from its package. Now for the year, I tried another washi masking, but it didn't look right. So I took a scrapbook flower and stuck it on 2012. I know which year I am in anyway, so I don't need to see it on the calendar.


Now the best part, I can reuse these washi pieces for remaining months. That's the beauty of washi tape, it peels right off. Just peel and stick as long as the glue allows.


I love it when something going to be wasted comes back to life. I am trying to work on a little command center area at our linen closet, which is where this calendar is hanging now from a command hook. I will post about whole area when it comes together.

Halloween week series - Day2 - Getting Crafty

Today is Day 2 of my Halloween Series I started yesterday. I planned on posting about getting crafty today. Since my daughter started preschool this year, she get to show off her costume at school on Halloween. They have a parade and potluck. I signed up for cookies, but wanted give something to the kids. For 30 of them, I had to be crafty so not to spend too much. Candy is such an obvious choice for Halloween Goodies, but kids get their sugar from trick or treating this day anyway, so I decided on halloween themed pencils and erasers. To make them more interesting, I followed this tutorial on The36thAvenue blog and added pompoms and googly eyes to make them monstrous, but they ended up being cute.

Here are my supplies:

Pencils - Dollar store, $1 for a 12 pack
Erasers - Micheals - $2.49
PomPoms, Eyes - Dollar Store - $1 each pack
Glue gun & glue sticks - on hand


The finished monster pencils:


I wanted to print out the free printable from the tutorial to add tags to the pencils, but my printer was out of ink :( so my monsters have to go bare this time.

Since the kids do expect some sugar in the bag, I added a juice box and Hershey's Kiss/Hug with a little sticker that says 'A kiss from Haasya' or 'A hug from Haasya'. These stickers were left overs from my daughter's ZOO themed 2nd birthday party, of which I have not posted the details yet. You can see the overview post here with pictures though.


The sweet girl helped me stamp some Jack'O Lanterns on brown lunch bags and in the goodies went.


A little washi tape later they are all packed and ready to go in a big bin, for easy hauling.


Sharing my first halloween craft at Gingersnap Crafts' 127th {wow me} wednesday party.


Monday, October 28, 2013

Halloween week series - Day1 - The PUMPKIN

Happy Monday everyone. Since this is Halloween week, just for fun, I wanted to do a series of Halloween posts each day this week. Nothing SPOOKtacular, just some BOOtiful things we have been doing in preparation for Halloween. I think it will be awesome to do this every year, but lets see if I can handle it. We'll take it one year at a time. For this week, this is the plan.

Monday - The Pumpkins
Tuesday - Getting Crafty
Wednesday - The Costume
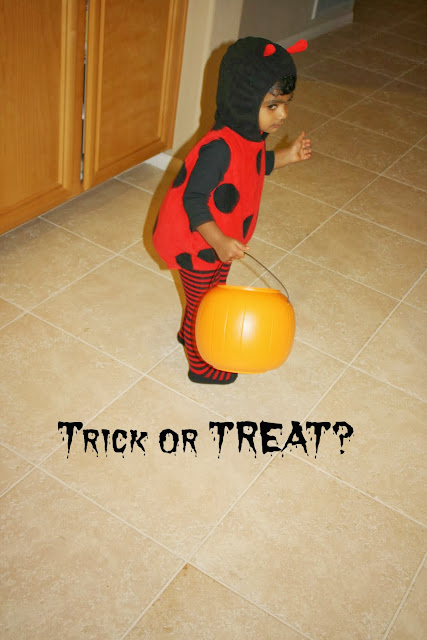
Thursday - Happy Halloween! Trick or Treat?
Friday - Highlights of the TERRORific day

For today, lets talk about the big old Pumpkin. The little one went to pumpkin patch with daddy last weekend and brought 2 big pumpkins. One that she decorated there and one plain sows can carve. Carving it is not easy, I found out last year. 1st time carving a pumpkin, just a basic Jack O' Lantern I tried with a kitchen knife. It came out ok, but I didn't research on treating it so it was moldy and nasty in couple of days.  So this year I went with the trusted painting route. I initially wanted to paint my daughter's hand prints, but it was more fun letting her paint the way she wants. She loved painting. So taped some painters tape on the pumpkin and cut out her initial. Then I gave her some paints (blue of course or she won't paint) and let her have a blast. 


Once the paint dried a bit, I peeled off the tape and we have this.


The small pumpkins I bought from grocery store. You don't really see all the colors I gave her, red white, metallic grey, black and blue, She just mixed up everything and made it a nice purplish grey, which matches with our front door though.

Speaking of matchy matchy, look at the other pumpkin she made at the patch.


Some more shots at the pumpkin patch this weekend. The girl loved it so much last week, she wanted to go again this weekend.


See you tomorrow with some crafts I want to do for school goody bags.

Kids Meal 2


School Lunch & Snack: Grilled cheese sandwich in butterfly shape (sneaked in some finely chopped spinach between cheese slices), boiled egg, cantaloupe, chocolate cream cookies (Bourbon cookies, indian brand)

Vitacost online store review

Has anyone been shopping at Vitacost?

I read about it in a magazine and coincidentally I saw it as seller on amazon for a high rated kids' juice box I was looking for (the brand is Froose, if you are interested). I visited their website and found a few other items (Justin's almond butter, tom's of maine children's tooth paste) that I had been planning to buy this week. Since I remembered from the magazine that this site offers $10 referral discount for both referee and referrer I googled and got one, but I had to spend $30 to get the $10 off, I added few more common staples like granola and organic lollipops and received the nice discount. I still had to pay 4.99 shipping but I still saved with that discount, plus the prices were much cheaper than the stores usually I shop. Justin's Almond butter would be $10.99 at our local Ralphs. Could have been higher at organic stores like Mother's Market. Vitacost has it for $8.75.


If you want a referral code for $10 off or $30, please click on the link here and click on unlock your offer button. Then register and you will have your code on screen as well as emailed to you. I will get a referral discount as well, if you register so thank you if you do.

Wednesday, October 2, 2013

Kids Meals - The Real World Problem for Moms - Kids Meal 1

I haven't posted any recipes or talked about food on this blog and I did not intend to when I started it. But as my daughter has grown from a baby to a preschooler, I needed help making dishes that are healthy and that she will actually eat. I realized normal family meals are not going to work. So naturally I reached out to internet for help. I found a bounty of inspiration and picked out some important elements to be a successful chef for my kid.

My key concepts:

1. Presentation Presentation Presentation! No matter how tasty the dish is, you can't manage to have your picky eater taste it unless it is visually appealing, atleast not mine. So I found the ultimate tool to prettify kids meals, THE COOKIE CUTTER. Yes, they make your life easy, not totally, but to a great deal. Collect some cookie cutters in basic shapes like circle, heart, star, flower and some in fun shapes like animals, butterfly, holiday, cartoon characters etc. They will be your new best friend. You can cut sandwiches, cheese slices, fruit, tortillas, deli meat, pancakes, waffles... the list goes on.

2. Sneak in the good stuff that your kid hates into the dishes that your kid loves. This is tricky because some food items have strong flavor. You have to do some trial and error, but there are ways to do it. For example, you can put cauliflower in mashed potatoes, spinach in smoothies and carrots in spaghetti  sauce.

3. Hang in there. Don't give up. Keep offering new food items/dishes to your child. It takes atleast 8-10 attempts to have the little ones take a bite of a new food. We don't stick around that long to make it work. For example, I offered my daughter Fried Calamari at Olive Garden 3 weeks ago. She straight away denied, even though she likes fried crispy stuff. So I didn't bother to offer tonight when we ordered the same, especially with the tired state of mind I was in. But when my husband did, she simply took it and ate, and asked for more. A reminder for me to keep trying.

Now I am attempting to regularly post some photos of her foods and possibly some recipes along the way so other moms can be inspired as well as suggest better ideas. I can't make every meal 100% natural and healthy, but my goal for each meal is to include whole grain, protein and fruit along with some sort of veggies sneaked in, plus a sweet treat that my kid likes.

Disclaimer: Foods pictured in boxes are what I pack for my almost 2.5 yr old for lunch and one snack while she is at school but she won't necessarily eat all of it. 50% leftovers is a good day for me. Days with barely any leftovers call for a celebration, though that's scarce. Foods pictured in plates are what I serve for breakfast/dinner at home. Please read descriptions below pictures for items that are missing in the picture, but are served as part of the meal.


Breakfast: Dollar size Sprinkles pancakes (recipe from here), banana slices in tulip and heart shapes, honey for dipping, 5 oz whole milk


School Lunch & Snack: Egg and Cheese Muffins, blueberries, cheese in flower shape, teddy grahams, homemade trial mix (cashews, yellow raisins, m&ms)


Light Dinner (when a lot of snacking happens in the evening): deep fried whole wheat tortillas (Puri in indian) again, cut in fun shapes (before frying), orange slices. 5 oz milk before bed (not pictured). Evening Snacks include String Cheese and chocolate filled cookies.

One other thing I would like to use around here is the ONE BITE RULE. Have one solid bite of everything that's served, even if she doesn't like it. We haven't been successful yet, but I got to get her to lick the food for taste. That's a good start right? I hope so.

Please feel free to leave a comment or send an email with your suggestions so I can better serve my kid.